Structure of the [System Settings] Screen
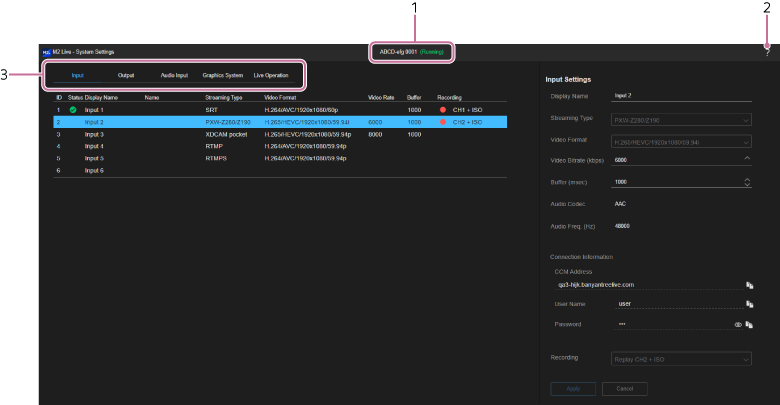
- Event name/status display: Displays the name/status of the event for which the [System Settings] screen was opened.
-
 (Help Guide): Select to display this Help Guide.
 -
Category tabs: Press a tab to switch the display contents.
- [Input]: Displays the status of streaming input source devices assigned to the event. Also used to set the input source device.
- [Output]: Displays the status of streaming output destination devices or services assigned to the event. Also used to set the output destination device or service.
- [Audio Input]: Displays the status of the audio input for audio commentary. If microphones are assigned to each channel, you can also release the assignments.
- [Graphics System]: Sets an external graphics system to input to this service.
- [Live Operation]: Adjusts the image quality of the video displayed on the [Live Operation] screen.
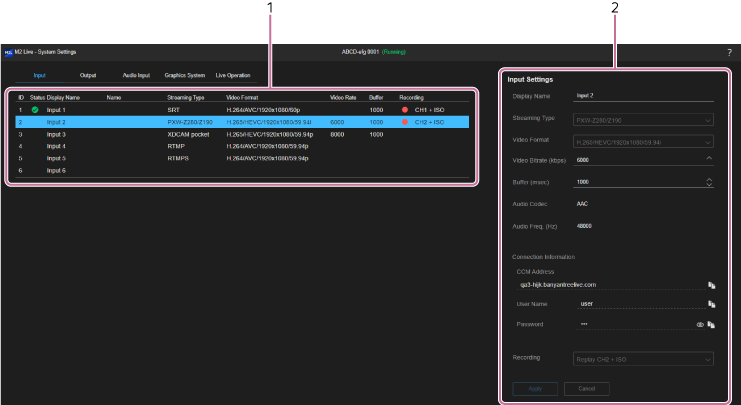
[Input] tab
-
Input sources list: Displays the status of streaming input source devices assigned to the event. Up to six input source devices can be assigned.
- [ID]: A number is automatically assigned to each row starting from the top.
-
[Status]: Displays the streaming status using icons.
-
 (Normal): Streaming input in progress.
 -
 (Caution): Streaming input in progress when both [Streaming Type] is [XDCAM pocket] and the frame rate settings are different.
 -
 (Error): Streaming input stopped or an error occurred after streaming had been in progress.
 - No display: No streaming input.
-
- [Display Name]: Displays the name specified when the device was assigned.
-
[Name]: Displays the name of the input source.
- When [Streaming Type] is [PXW-Z280/Z190]: Displays a name in “(Camera model)_(Serial number)” format.
- When [Streaming Type] is [XDCAM pocket]: Displays the name specified in [Display name] in the XDCAM pocket app.
- When [Streaming Type] is other than the above: Not displayed.
- [Streaming Type]: Displays the streaming type.
- [Video Format]: Displays the video format.
- [Video Rate]: Displays the video bit rate (Unit: kbps).
- [Buffer]: Displays the buffer size (Unit: milliseconds).
-
[Recording]: Displays [CH 1] to [CH 3], whichever is assigned as an internal recording channel for instant replay. An “+ ISO” suffix is displayed when the ISO recording setting is enabled on the [Output] tab. During internal recording or ISO recording,
 (Recording) is displayed on the left side
- [Input Settings]: You can change the settings for the row selected in the list on the left side.
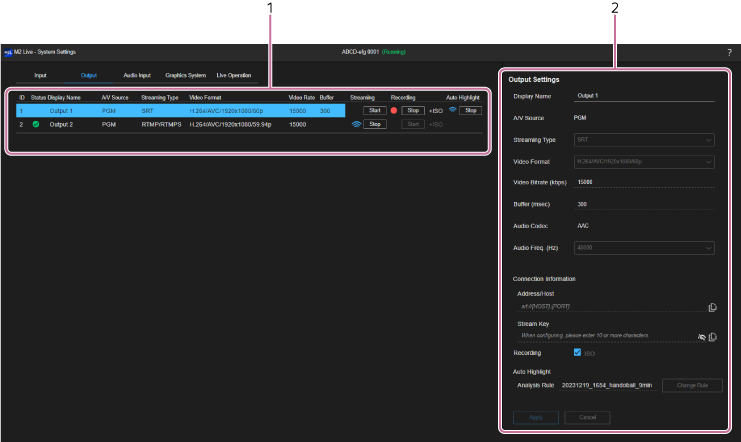
[Output] tab
-
Output destinations list: Displays the status of streaming output destination devices or services assigned to the event. Up to two output destination devices or services can be assigned.
- [ID]: A number is automatically assigned to each row starting from the top.
-
[Status]: Displays the streaming status using icons.
-
(Normal): Streaming output in progress.
-
(Error): Streaming output stopped due to an error or other cause.
- No display: No streaming output.
-
- [Display Name]: Displays the name specified when the device or service was assigned.
- [A/V Source:]: Displays the output source.
- [Streaming Type]: Displays the streaming type.
- [Video Format]: Displays the video format.
- [Video Rate]: Displays the video bit rate (Unit: kbps).
- [Buffer]: Displays the buffer size (Unit: milliseconds).
-
[Streaming]: Press the [Start] button to start streaming output and press the [Stop] button to stop streaming output.
The label switches between [Start] and [Stop] according to the status of the streaming output. During streaming output, (Streaming output) is displayed on the left side of the button.
 -
[Recording]: Press the [Start] button to start recording the output and press the [Stop] button to stop recording. The label switches between [Start] and [Stop] according to the status of the recording.
When ISO recording is enabled, “+ ISO” is displayed on the right side of the button and ISO recording occurs with the same timing as output recording.
During recording, (Recording) is displayed on the left side of the button.Note
- The output recorded content will vary depending on the [A/V Source] setting. When [A/V Source] is set to [PGM], program output is recorded. When set to [Clean], clean output is recorded. Clean output in this service refers to program output video excluding DSK and audio excluding audio commentary (AUX).
- Recording the output is supported only when [Video Format] is set to an H.264 format and [Audio Freq. (Hz)] is set to [48000] in the output destination settings.
The [Start] button is disabled in all cases except the above. - The recording of output on the two output destinations simultaneously is not supported. When you start recording one output destination, the [Start] button for the other output destination is disabled.
- [Output Settings]: You can change the settings for the row selected in the list on the left side.
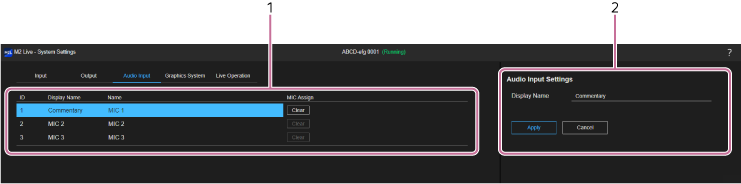
[Audio Input] tab
-
Audio input sources list: Displays the status of the audio input for audio commentary. You can assign audio input devices, such as a microphone on a computer being used, to each channel on the [Audio Mixer] tab of the [Live Operations] screen.
- [ID]: A number is automatically assigned to each row starting from the top.
- [Display Name]: Displays an arbitrary specified name.
- [Name]: Displays [MIC 1] to [MIC 3].
- [MIC Assign]: If microphones are assigned to each audio input on the [Audio Mixer] tab of the [Live Operation] screen, you can release the assignment by pressing the [Clear] button. This is useful when you cannot release a microphone assignment on the [Live Operation] screen or when a person other than the user of the microphone (such as the director) wants to change the microphone assignment.
- [Audio Input Settings]: You can change the settings for the row selected in the list on the left side.
[Graphics System] tab
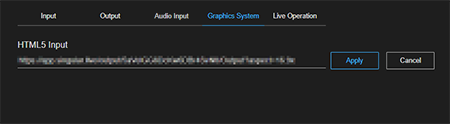
Sets the URL of an external graphics system to input to this service.
Modifying the setting when the event status is “Running” will display a confirmation message and cause the event to be restarted automatically. Cannot be modified while streaming output or recording is in progress.
[Live Operation] tab
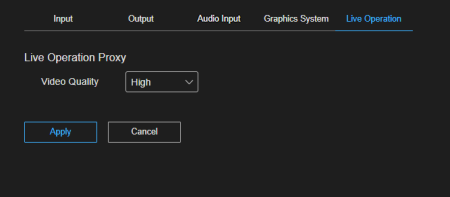
You can select the image quality of the video displayed on the [Live Operation] screen.
Modifying the setting when the event status is “Running” will display a confirmation message and cause the event to be restarted automatically. Cannot be modified while streaming output or recording is in progress.