Creating and Deleting an Event
-
Press
 (Create New) on the [Dashboard] screen.
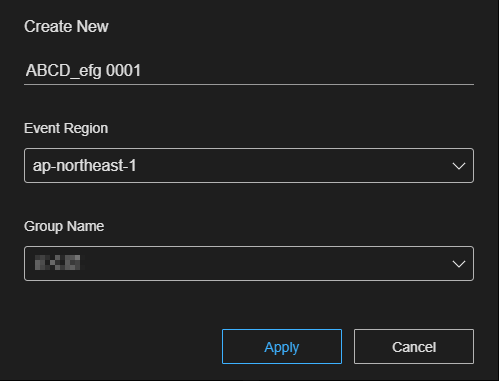
-
In the dialog that appears, set the event name and region.
Enter 1 to 40 characters for the event name.
Select a region that is close to the installation location of the camera and where live operation will be performed.
If the region close to the installation location of the camera and the region close to where live operation will be performed are different, select a region using the following guidelines.
- To minimize phase shift fluctuations when working with multiple cameras:
Select a region close to where the cameras are installed. - To minimize the response time for live operation:
Select a region close to where live operation will be performed.
Note
- The region cannot be changed after creating an event. Select appropriately when creating an event.
- The region selection options will vary depending on the target country or region configured for the user account. There may also be only one selection option.
- To minimize phase shift fluctuations when working with multiple cameras:
-
Press the [Apply] button.The event is created and is added to the event list.
Hint
- In rare cases where an event is not created and the status remains “Initializing” for 5 minutes or longer, you can cancel the creation of the event by pressing
 (Delete).
- In rare cases where an event is not created and the status remains “Initializing” for 5 minutes or longer, you can cancel the creation of the event by pressing
To delete an event
Select the event you want to delete in the event list and press ![]() (Delete). Press [YES] in the confirmation dialog to delete the event.
(Delete). Press [YES] in the confirmation dialog to delete the event.