Connecting using a USB Cable
Connect the camera and control device using a USB cable.
This enables a faster, more stable connection than with a Wi-Fi connection.
- A control device with a USB Type-C connector is required. Connect the camera and control device using a single Type-C USB cable without using an adapter.
- For high-speed communication, the camera, control device, and USB cable should all be compliant with USB 3.2.
- When connected via a USB cable, the following functions are unavailable.
- Timecode display
- [Focus map]
- Importing a LUT*
* May be available, depending on the camera and firmware.
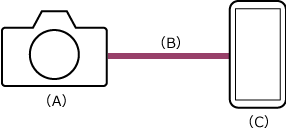
(A) Camera
(B) USB connection
(C) Control device on which this app is installed
-
 : Press the MENU (Menu) button to display the menu.
 -
: Select
 (Setup) – [USB] – [USB Connection Mode] – [Remote Shooting].
Remote connections are enabled.
Depending on the cable used,
(Setup) – [USB] – [USB Power Supply] – [Off] may need to be selected (some models do not have this option). -
: Select [Access Authen. Info] on the screen.
The user name and password appears.
-
 : Launch the app and tap
  (App menu) – [Connect].
 -
: Select [USB] on the connection screen.
-
: Connect the control device to the USB Type-C connector of the camera using a USB cable.
After connecting, several permissions prompt messages may appear, including a prompt for permission to access files on your control device. Grant permission for all prompts.
-
: Tap [Connect] for the camera to connect on the connection screen.
If you have trouble connecting
Refer to the Monitor & Control support page.
TP1001690997