ND
This topic describes how to set the ND.
- The setup screen or control bars may appear differently than those shown here, depending on your camera and the firmware version.
-
Tap
 (Menu) – [Monitoring].
The [Monitoring] screen appears.
-
Tap [ND].
The ND setup screen appears.
-
Check the ND setting and adjust the ND as required.
- The configurable items will depend on the connected camera. For details, see the Help Guide or operating instructions for the camera.
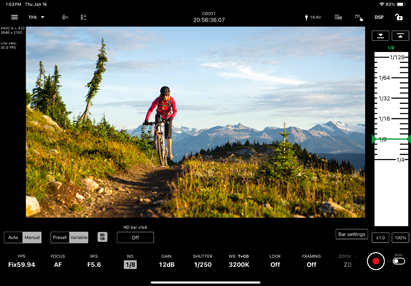
[ND bar click]
[Off]: The position where you release your finger from the control bar becomes the ND value.
[On]: If the position where you release your finger on the control bar is between scale marks, the position will automatically move to the nearest scale mark from where you released your finger, and the value of that scale mark will become the ND value.
- Control bars
You can scroll the control bars to adjust the ND. On a tablet (iPad), control bars can be displayed on the left or right.
[Bar settings]
- [Left bar]/[Right bar]: Select the setup items ([FOCUS], [IRIS], [IRIS (Relative)], [ND], [None]) to display on the left/right control bars. Place a check mark in [Reverse] to switch the ascending/descending orientation of the scale on the control bars. By default, only the right control bar is displayed.
- [Focus distance display]: Sets the display units.
- [Bar background color]: Set the bar background color.
 (Upper limit),
 (Lower limit)
Set the current set value to the upper limit or lower limit. Scrolling the control bar beyond the limits becomes disabled.
[x0.1] to [x1.5]
Select the scrolling speed of the control bars.
[50%] to [350%]
Select the display magnification of the control bars.