Configuring the Network Settings of the Projector
You can configure the network settings on the [Network] page in [Advanced Settings].
Note
- The entered value will not be applied until the [Apply] button is clicked.
-
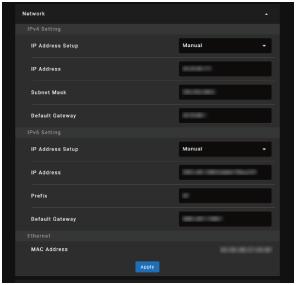
Select [Advanced Settings] - [Network] and display the [Network] page.
-
Configure the [IPv4 Setting] and [IPv6 Setting] items.
-
Check the items in [Ethernet].
The MAC address of the projector is displayed at [MAC Address].
-
Click the [Apply] button.
Settings
[IPv4 Setting]
- [IP Address Setup]: You can select the IP address setting method.
- [Auto(DHCP)]: Network settings are automatically assigned by the DHCP server functions such as the router.
- [Manual]: Network settings are configured manually.
- [IP Address]: The IP address of the projector is set.
- [Subnet Mask]: The subnet mask of the projector is set.
- [Default Gateway]: The default gateway of the projector is set.
[IPV6 Setting]
- [IP Address Setup]: You can select the IP address setting method.
- [Auto]: Network settings are automatically assigned.
- [Manual]: Network settings are configured manually.
- [IP Address]: The IP address of the projector is set.
- [Prefix]: The prefix length (bit) is set.
- [Default Gateway]: The default gateway of the projector is set.