Attaching the damping plate to the aircraft
The damping plate (with the quick-release pre-installed), hex wrench, and hex screws are included in the gimbal set (sold separately).
- Attach the damping plate to the aircraft.
- Perform the operations described in “Connecting cables to the aircraft.”
- Orient the damping plate so that the quick-release arrow (
 ) surface faces down and the arrow points toward the front of the aircraft.
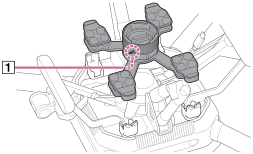
- While maintaining the same orientation, place the damping plate on the attachment points of the aircraft.
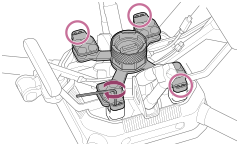
- Use the hex wrench (H2.5 mm) and hex screws included in the gimbal set (sold separately) to attach the damping plate at two positions on each leg (eight in total).
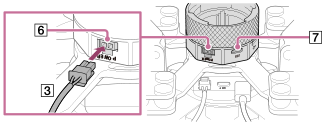
- Insert the plugs at the other ends of the cables connected to the aircraft in the corresponding quick-release ports.
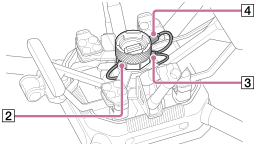
 Control cable (aircraft — gimbal)
 Power cable (aircraft — gimbal)
 USB Type-C® cable (aircraft — gimbal)
Front of aircraft
-
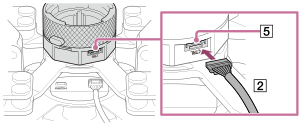
Connect the control cable (aircraft — gimbal) (
) to the control port ( ).
).Insert fully until the plug locks into place.
Rear of aircraft
-
Connect the power cable (aircraft — gimbal) (
) to the POWER port ( ).
).Insert fully until the plug locks into place.
-
Connect the USB Type-C® cable (aircraft — gimbal) (
) to the USB port ( ).
).
-
Note
- Tighten the screws firmly using the hex wrench included in the gimbal set (sold separately). Otherwise, the screws may loosen and detachment may occur during flight.
- When using tools other than the hex wrench included in the gimbal set (sold separately), be sure to tighten the screws with a torque of 1.5±0.5 Nm.