Starting/Stopping Recording
This topic describes how to start/stop recording.
-
Attach the necessary devices, and check that power of the unit and peripheral devices is being supplied.
Note
- Recording is not supported when using a PoE++ power supply.
-
Insert the memory card(s).
-
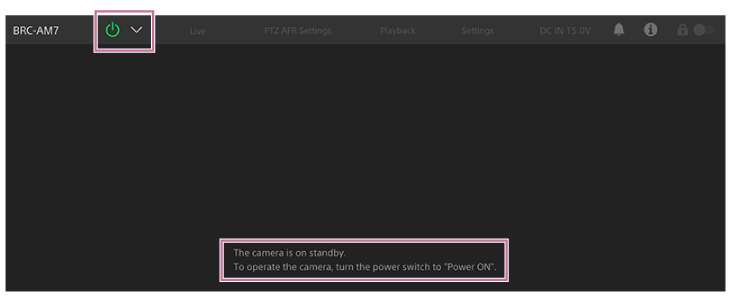
Check the power status of the unit at the top left of the Web App screen.
When power supply is on
When the power to the unit is turned on, the live operation screen, playback operation screen, or web menu is displayed in the Web App.

The POWER lamp lights up on the front of the unit and the camera image appears on the live operation screen of the Web App.
Note
- If the administrator password has not been configured, a screen prompting you to configure the password appears. See “Initializing the Unit.”
When power supply is in standby state
When the power supply of the unit is in standby state, a message is displayed in the Web App indicating the power supply is in standby state.

Press the power switch and select [Power ON] in the switch menu. The unit turns on, the POWER lamp lights up green on the front of the unit, and the camera image appears on the live operation screen of the Web App.
Hint
- You can also turn on the unit using the power button on the supplied infrared remote control.
-
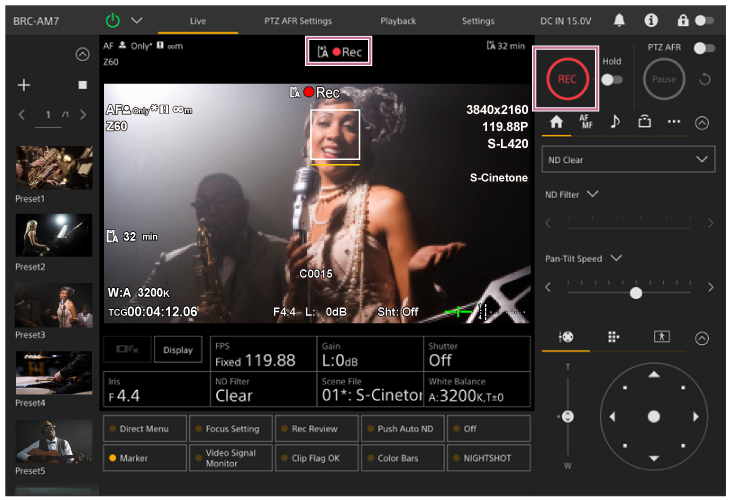
Press the record START/STOP button.
Recording starts, and the recording/tally lamp (2 places) of the unit lights up.
During recording, the record START/STOP button lights. Also, an icon for the target recording media and [●Rec] are displayed.

-
To stop recording, press the record START/STOP button again.
Recording stops, and the recording/tally lamp (2 places) of the unit turns off.
During recording standby state, the record START/STOP button is not lit. Also, an icon for the target recording media and [Stby] are displayed.
Hint
- You can also start/stop recording using the record START/STOP button on the supplied infrared remote control.
To switch the power supply of the unit to standby state
Press the power switch in the Web App and select [Power Standby] in the switch menu to set the power supply of the unit to standby state.
Hint
- You can also set the power supply to standby state using the power button on the supplied infrared remote control.

