Tracking Ball Sports (Basketball) Automatically from an Elevated Position
You can automatically track players and the ball within a set area (court) from an elevated position.
Camera position
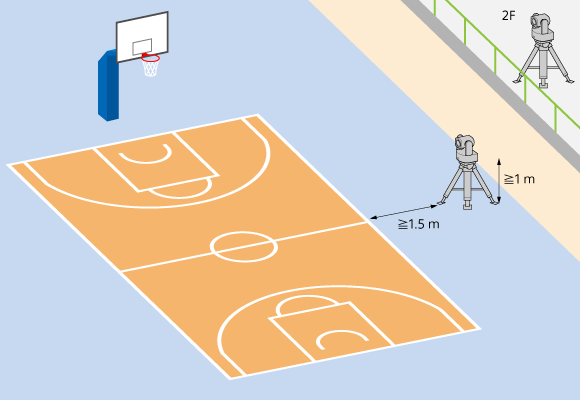
When shooting in “Ball Sports (Basketball)” mode, place the camera next to the court on the first floor or in the spectator seating/shooting area on the second floor or above, as shown below.
- Mount camera aligned with the center of the court (along an extension of the center line)
- Camera height of 1 m or higher
- Distance between camera and court of 1.5 m or longer
Note
- This function is intended for indoor use on an official basketball court (28 m × 15 m) with a ball (reddish-brown to brown, size 5 to 7). In other environments, the performance may not be sufficient.
- Use a shutter speed of 1/50 or faster. If the shutter speed is slow, there may be a reduction in performance.
- Depending on the position of the camera (distance to the court, height of camera), the sideline of the court in front of the camera may not be visible if the camera angle does not extend downwards sufficiently. If necessary, mount the camera from the ceiling.
Hint
- The camera should be mounted horizontally, parallel to the court (floor).
Starting Ball Sports (Basketball) tracking
-
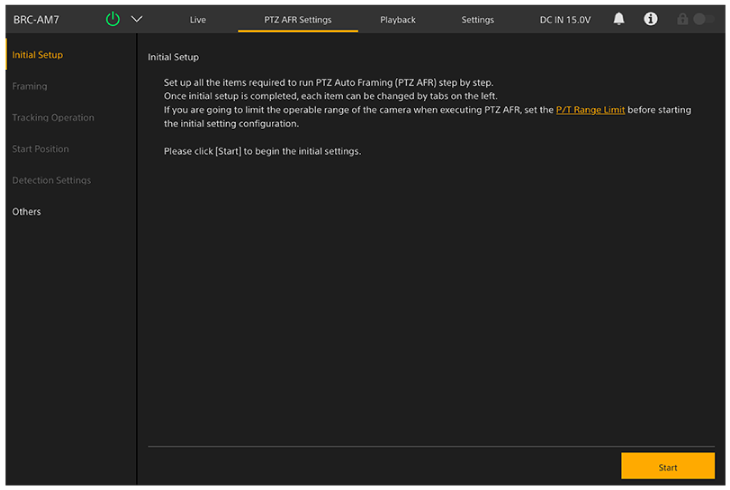
Press the [PTZ AFR Settings] tab.
The [Initial Setup] screen of the PTZ AFR settings screen appears.
-
Check the description on the screen and press the [Start] button.
Hint
- The [Start] button is displayed only when configuring settings for the first time.
Configuration of the PTZ auto framing settings starts.
-
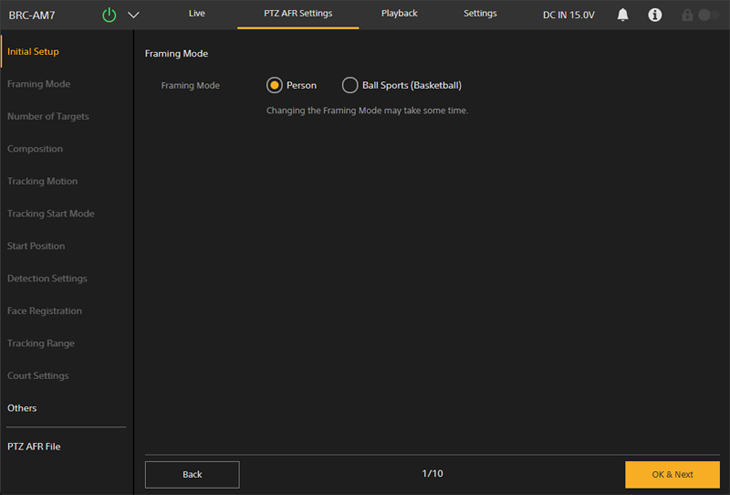
Select [Ball Sports (Basketball)] on the [Framing Mode] screen.
-
Press the [OK & Next] button.
Note
- If you change the framing mode, you may not be able to change the framing mode again or turn on PTZ framing for several tens of seconds. In that case, wait a while and try again.
- When [Ball Sports (Basketball)] is selected with PTZ auto framing turned off, red lines indicating the range of the court are displayed in the camera image panel of the Web App and in [Video Stream 3].
-
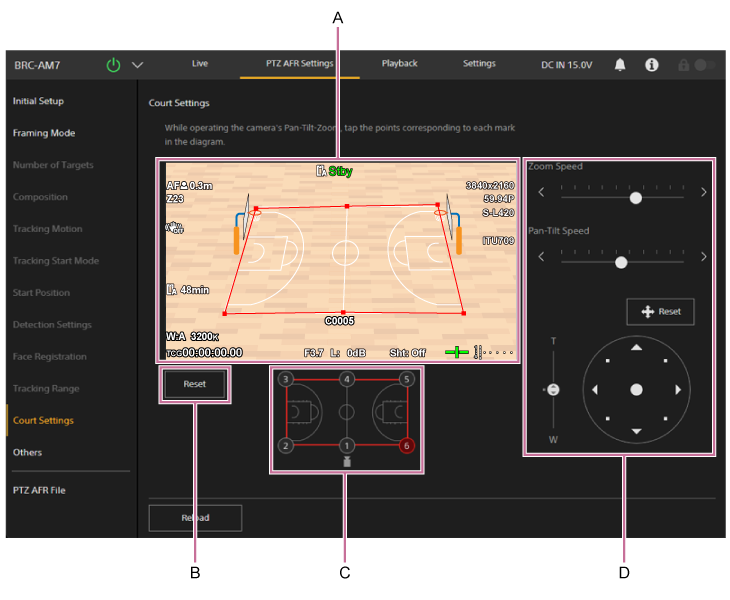
Set the court on the [Court Settings] screen.
-
A: Court setup panel
While monitoring the camera image, set the point corresponding to the number specified in the operating point designation setup panel (C) using the framing control panel (D). Click/tap a position in the image to set a point at that position. Set points to match the actual court. -
B: Court settings reset button
Restores the court settings to the default values. -
C: Operating point designation setup panel
Specifies the points to set in the court setup panel (A). Click/tap a number, highlighting the point in red, to indicate the specified point. -
D: Framing control panel
Operate the pan, tilt, and zoom to adjust the framing for configuring the court. You can adjust the speed of pan/tilt and zoom separately.- Press the
 (Reset) button to reset the pan/tilt. Press the button when the POWER lamp and NETWORK lamp are blinking simultaneously or when [Execute Pan-Tilt Reset.] is displayed in the framing control panel.
- Press the
Note
- Always set the six points in the court setup panel. If the corresponding point cannot be captured within the field of view due to the tilt range, set the point closest to the corresponding point on the image.
-
Reconfiguration will be required in the following cases.
- When the [Tele Convert] setting is changed
- When [S&Q Motion] – [Frame Rate] is set to a value exceeding 60fps
- When [P/T Direction] – [Direction] – [Ceiling] is changed
-
-
Press [Others] on the left side of the screen.
-
Configure other settings on the [Others] screen.
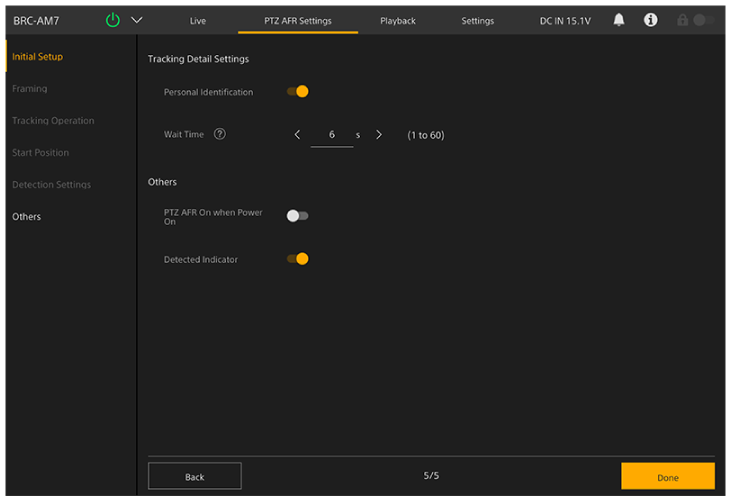
Configure the following settings, as required.
- [PTZ AFR On when Power On]: Set to the on position to start with PTZ auto framing enabled when the unit is turned on.
Note
- Each item in [Tracking Detail Settings] and [Frame/Area Indicator] are disabled in “Ball Sports (Basketball)” mode.
-
When finished configuring, press the [Done] button.
The following completion screen appears.
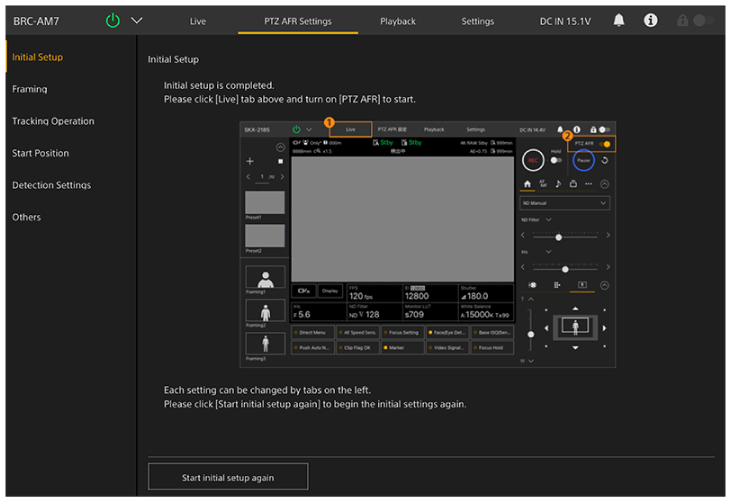
-
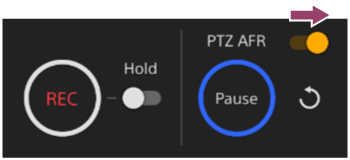
Set the [PTZ AFR] switch to the on position on the live operation screen.
The area around the [Pause] button blinks blue.
Hint
- You can also press the PTZ AUTO FRAMING ON button and OFF button of the supplied infrared remote control to set the [PTZ AFR] switch on/off.
The camera image automatically moves to the center line area of the court. Automatic tracking starts when a certain number of people are detected in the court area configured on the [Court Settings] screen.
During auto tracking, the [Pause] button is enabled and the surrounding area is lit blue.
- If detection of the person being tracked is lost, you can press the
 (Restart) button to return to the center line area of the court and wait for detection of a tracking target to resume tracking. You can also manually operate the pan/tilt/zoom to bring the tracking target into the field of view and press the [Resume] button to resume tracking.
Hint
- Unless you have a specific preference, setting auto focus is recommended. The tracking performance will be reduced if the person is out of focus.
- If you press the [Pause] button during auto framing, the pan/tilt/zoom operation due to auto tracking is paused, and the button changes to a [Resume] button. To resume auto framing, press the [Resume] button.
- If you operate the joystick/zoom slider or recall a preset position during auto framing, the pan/tilt/zoom operation due to auto tracking is paused, and the button changes to a [Resume] button. To resume auto framing, press the [Resume] button.