


Attaching the XLR Handle Unit (ILME-FX5 only)
When the XLR handle unit is attached to the unit, you can use the functions of the XLR adaptor.
Note
- The XLR-H1 XLR handle unit (sold separately) cannot be attached to the unit.
-
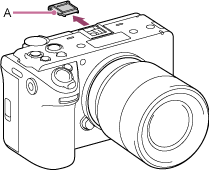
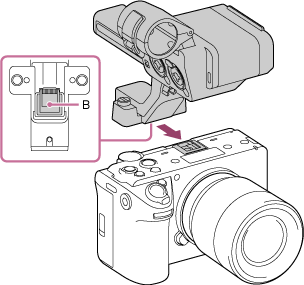
Remove the shoe cap (A) and attach the Multi Interface foot (B) of the XLR handle unit to the Multi Interface Shoe.
-
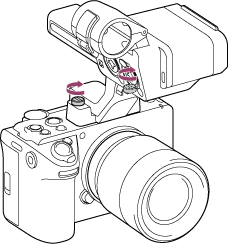
Firmly tighten the two screws using a coin or other object.
Note
- Turn off the camera before attaching or removing the handle.
- When attaching the XLR handle unit, firmly tighten the two handle attachment screws. Using the handle without fastening the handle attachment screws may damage the Multi Interface Shoe contacts or cause the camera to fall off.
Attaching the accessory shoe
-
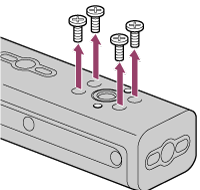
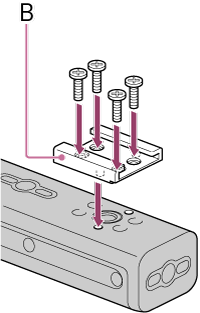
Remove the four screws from the XLR handle unit.
-
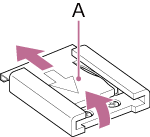
Lift the front edge of the accessory shoe plate (A), and pull the plate in the opposite direction to the arrow engraved on the plate.
-
Position the accessory shoe (B) on the accessory shoe mount, aligning the protrusions on the shoe with the corresponding points on the mount, and tighten the four screws.
- Use the screws supplied with the accessory shoe kit.
-
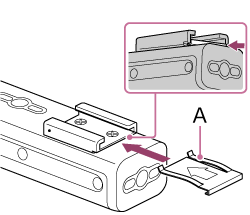
Insert the accessory shoe plate (A) in the direction of the arrow so that the U-shaped portion fits onto the end of the accessory shoe.
Note
- Forcing it into place in the wrong orientation may cause damage.
Hint
- To remove the accessory shoe, remove the accessory shoe plate as described in step 2, unscrew the four screws, and remove the accessory shoe.
TP1002274778