


Top Side
-
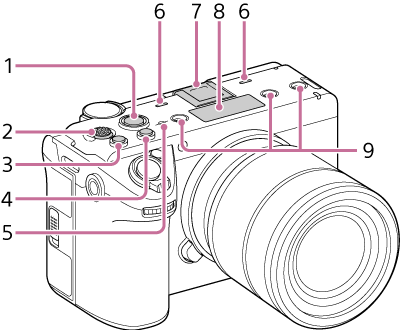
Record START/STOP button
Press the record START/STOP button, turning the light on, to start recording. Press again, turning the light off, to stop recording.
-
Multi selector
Used for auto focus operation and menu operation. Moves the cursor in 8 directions and selects/applies values when pressed.
- Assignable button 3
- Assignable button 2
-
 Image sensor position indicator
The image sensor converts light into electrical signals. The position of the sensor surface is indicated by
(image sensor position indicator). To accurately measure the distance to a subject, measure the distance relative to this line.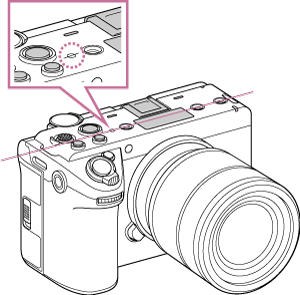
-
Internal microphone
Microphone for recording ambient sound.
-
Multi Interface Shoe
Use to attach the XLR handle unit and other accessories (sold separately).

For details about accessories supported by the Multi Interface Shoe, contact your sales representative.
-
VF connector
Connect to DVF-EL1 viewfinder (sold separately).
-
Accessory screw hole
Compatible with 1/4-20 UNC screws
When attaching an accessory, use a screw of length 5.5 mm or shorter. If you use a screw that is longer than 5.5 mm, you will not be able to firmly secure the accessory to the unit, and the unit may be damaged.