


Attaching a Microphone (sold separately)
You can attach a microphone (sold separately).
-
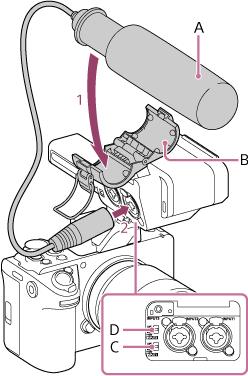
Place the microphone (A) in the microphone holder (B).
Note
- Before connecting/disconnecting a microphone, be sure to set the INPUT1 (LINE/MIC/MIC+48V) switch to a position other than “MIC+48V.” Plugging/unplugging a cable while the switch is set to “MIC+48V” may cause a loud noise or a malfunction of the microphone.
-
Connect the microphone cable to the INPUT1 or INPUT2 connector.
-
Set the INPUT1/INPUT2 (LINE/MIC/MIC+48V) switches (C/D) according to the type of the microphone.
MIC: Dynamic microphone, battery-operated microphone
MIC+48V: +48 V phantom power microphone
-
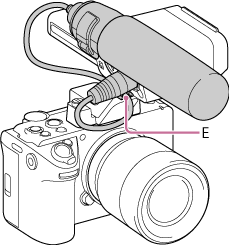
Place the microphone cable into the cable holder (E).
Hint
- If you cannot attach the microphone securely, use the spacer supplied with the microphone.
- Depending on the type of lens attached, the tip of the microphone may be visible in the image. Adjust the position of the microphone.
TP1002215260