Mounting Upright in a Fixed Location
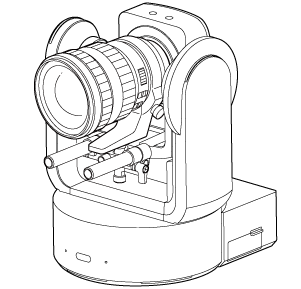
This topic describes mounting the unit on a desktop or tripod.
Installation note
- To protect the lens and the lens connector block of the unit, keep the cap and cover of the unit attached until you attach the lens.
- To prevent lens failure, do not hold the lens parts while working.
- To prevent unit failure, do not hold the camera head while working.
-
Check the mounting space.
When mounting on a desktop
Mount this unit on a flat surface, taking into consideration the space required for turning the lens and the wiring at the rear of the unit.
Note
- Mount it in a stable location that is not subject to vibration. Locations subject to vibration may cause vibration in the image.
- If the unit must be mounted on an inclined surface, keep it within ±15° of the horizontal and take measures to prevent the unit from falling.
When mounting on a tripod
Attach the tripod to the tripod mounting screw hole on the bottom.
Use a tripod mounting screw with the following amount of protrusion from the mounting surface, and tighten it with a hand screwdriver.
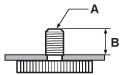
A: Tripod mounting screws 1/4-20 UNC, ISO 1222 (6.35 mm)
B: Protrusion (4.5 mm to 5.5 mm)

- Do not use tripod screws for mounting the unit in a high location.
Note
- Select a tripod that will not tip over even when the lens turns.
Next, attach the lens. See “Attaching a Lens,” taking into account the information in “Precautions When Attaching/Removing a Lens,” “Checking the Lens Switches,” and “Precautions When Using a Zoom Lens.”