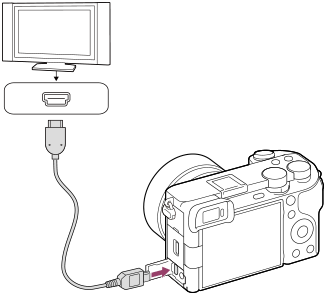
Viewing images on a TV using an HDMI cable
To view images stored on this product using a TV, an HDMI cable (sold separately) and a TV equipped with an HDMI jack are required. For details, refer to the operating instructions supplied with the compatible TV.
- Turn off both this product and the TV.
- Connect the HDMI terminal of this product to the HDMI jack of the TV using an HDMI cable (sold separately).
Use an HDMI cable that is compatible with the HDMI Type-D micro jack of the product and the HDMI jack of the TV.

- Turn on the TV and switch the input.
- Turn on this product.
Images shot with the product appear on the TV screen.
- Select an image using the right/left sides of the control wheel.
- The monitor of this camera is not lit up on the playback screen.
- If the playback screen is not displayed, press the
 (Playback) button.
Note
- Do not connect this product and another device using the output terminals of both. Doing so may cause a malfunction.
- Some devices may not work properly when connected to this product. For example, they may not output video or audio.
- Use an HDMI cable with the HDMI logo or a genuine Sony cable.
- When [Time Code Output] is set to [On], the image may not be output properly to the TV or recording device. In such cases, set [Time Code Output] to [Off].
-
If images do not appear on the TV screen properly, select MENU →
 (Setup) → [External Output] → [
 HDMI Resolution] → [2160p], [1080p] or [1080i] according to the TV to be connected.
- During HDMI output, when you switch the movie from 4K to HD image quality or vice-versa, or change the movie to a different frame rate or different color mode, the screen may become dark. This is not a malfunction.
- If the product performs unwanted operations in response to the TV remote control, select MENU →
 (Setup) → [External Output] → [CTRL FOR HDMI] → [Off].
TP1001248283

