Adding a New Fluorochrome
- Click [Unmixing Settings] in the [Unmixing] group on the [Unmixing] tab of the ribbon.
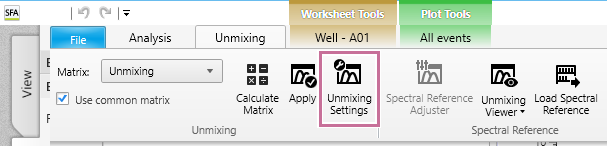
The [Unmixing Settings] dialog appears.
- Enter a fluorochrome name, then click [Add].
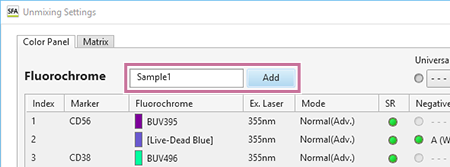
The [Add New Fluorochrome] dialog appears.
- Set each item, then click [OK].
[Preview] displays an image representing the spectrum waveform for the currently selected fluorochrome.
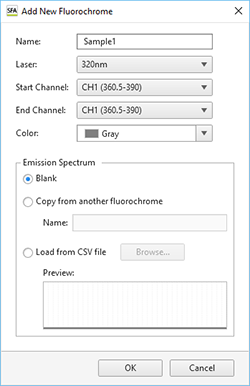
[Name]: Enter the name of the fluorochrome.
[Laser]: Selects the laser to use.
[Start Channel] / [End Channel]: Enter the range of valid channels for the fluorochrome.
[Color]: Selects the display color.
[Emission Spectrum]: Selects the fluorochrome spectrum image waveform. Selecting the waveform displays a preview.
- [Blank]: Does not display a waveform.
- [Copy from another fluorochrome]: Uses another waveform registered in the database. When selected, enter the name of the fluorochrome.
-
[Load from CSV file]: Loads waveform information from a CSV file. When selected, click [Browse] to specify the CSV file. The CSV file has the following format.
Wavelength, Intensity
Example: 500, 0.01
501, 0.02
502, 0.04
…
625, 1
…
799, 0.01
800, 0
The fluorochrome is added.
The added fluorochrome is also automatically added to the fluorochrome drop-down list in the [Unmixing Settings] dialog.